In earlier versions of Tripline, we had a simple mechanism to calculate total distance for a trip. Basically it measured geodesic distance (straight line across a sphere) between all the points and added it all up. That works fine for trips that only have straight lines, but it was inaccurate for trips that followed driving, bicycling, walking and custom routes. So, in our latest release (April 19, 2025) we rebuilt the mechanism to measure true distance for each segment. It’s much more accurate, and we also display travel distance and estimated duration for each segment as well.
How it looks now
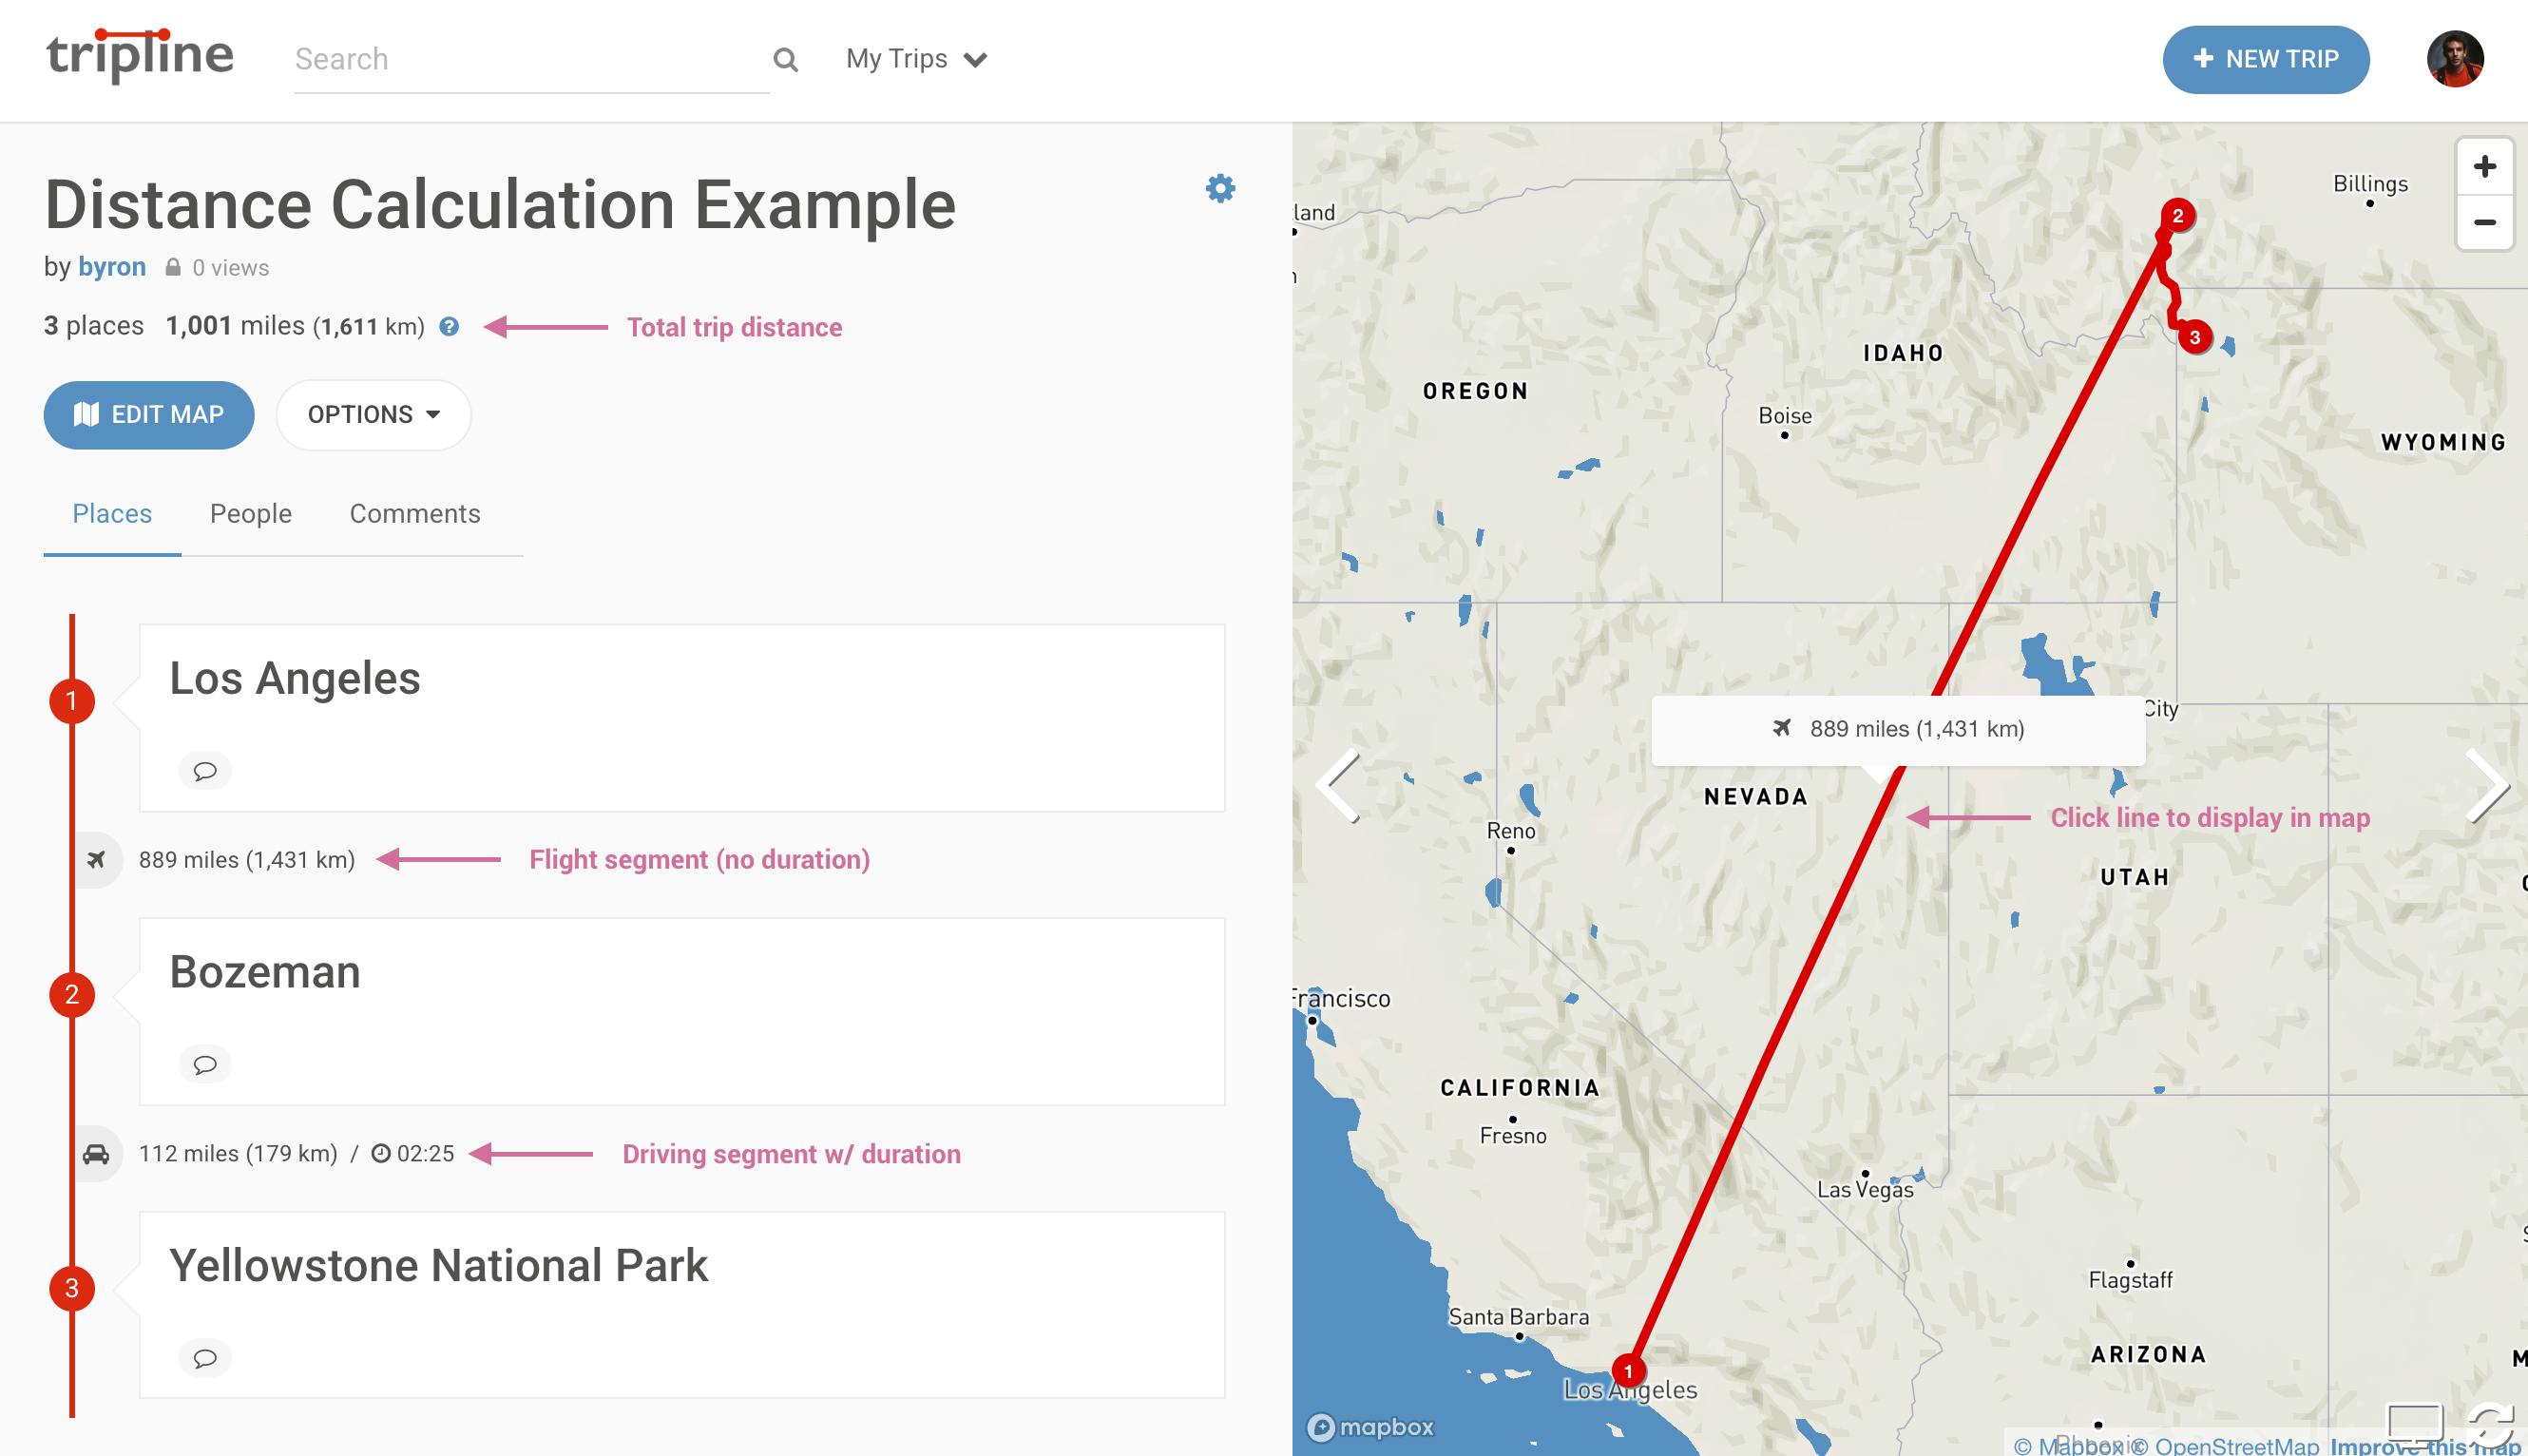
Here’s how we display distances on trips. It’s similar in the mobile app.
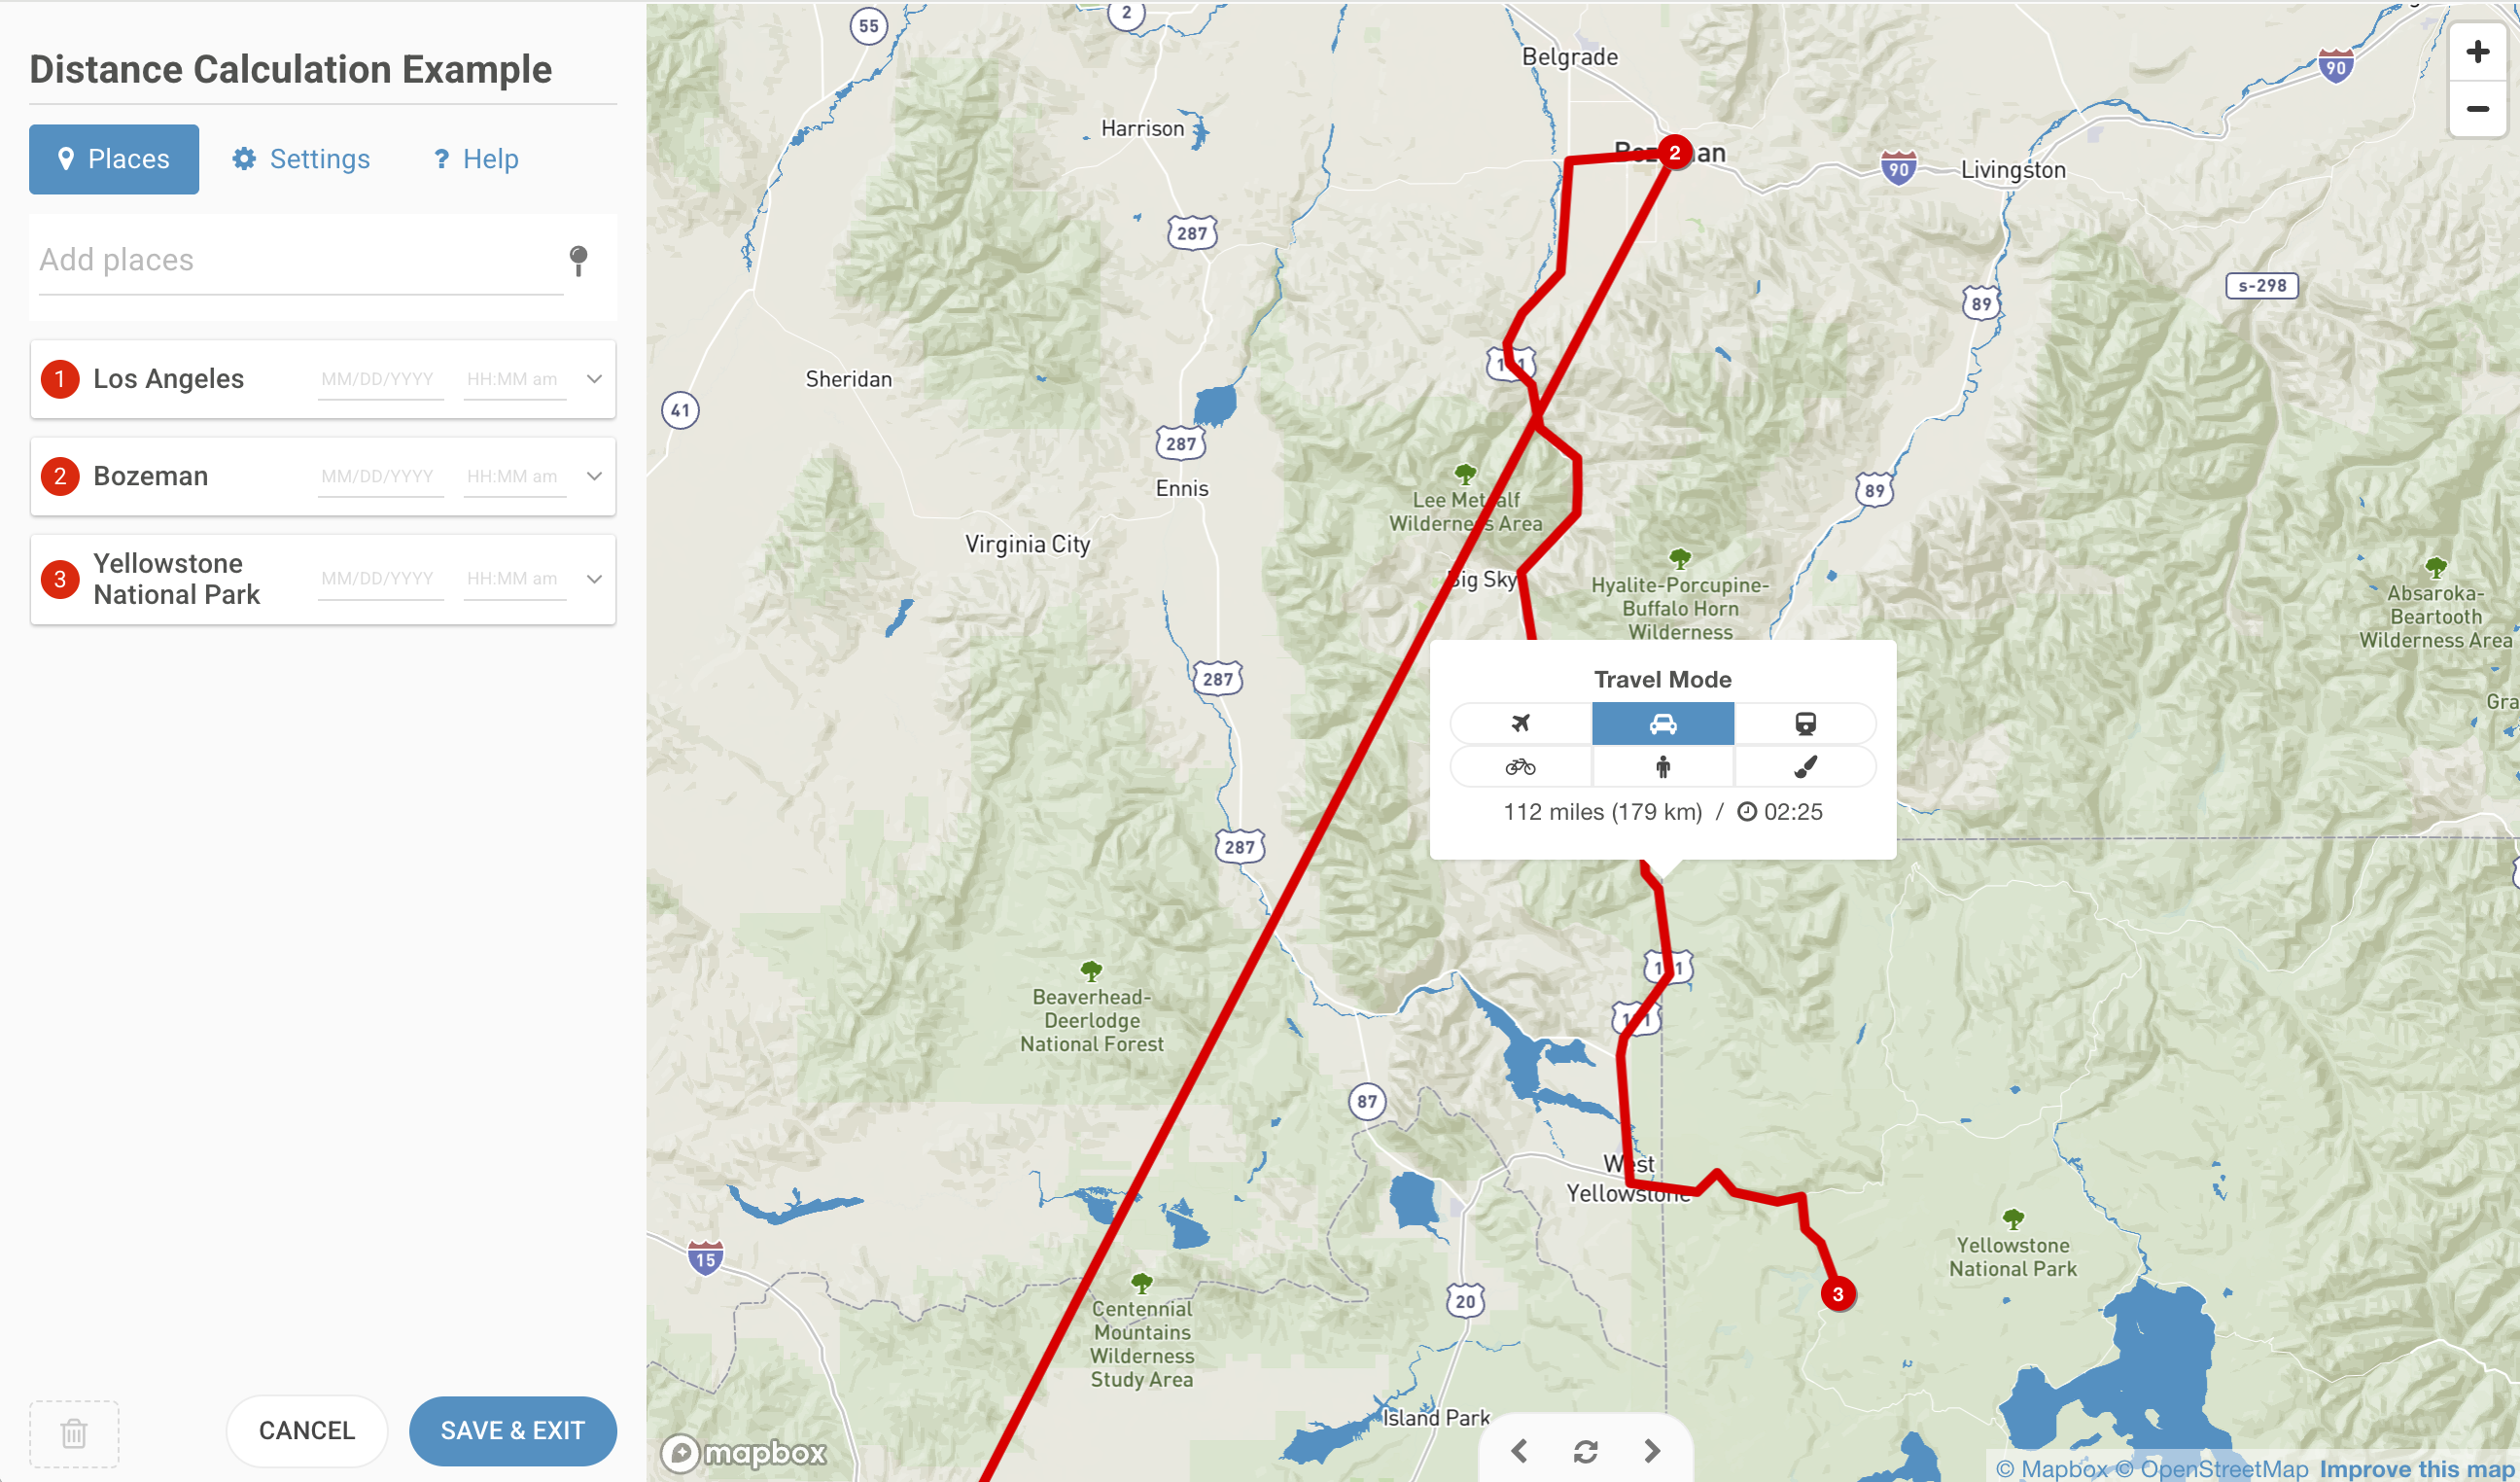
And here’s how it looks in the editor where you can choose travel mode
How it works
When you add places to a trip, we have an algorithm that automatically chooses the likely travel mode between two points based on distance. If it’s a short distance (under 1km), the system chooses WALKING. If it’s under 500km, the system chooses DRIVING. Otherwise it sets a geodesic path (straight line across a sphere) which is like a flight path. You can then click the line to select the travel mode you want for any line. If our directions service can’t find a route between the points, we reset to a geodesic path (for example if you choose DRIVING for a line between New York and London).
The method used to calculate distance and duration differs by travel mode.
| Travel Mode | Distance | Duration | Notes |
| FLYING (Default) | Geodesic distance between points | None | We thought about estimating duration, but there’s no accurate way to do it. |
| DRIVING | Detailed route distance provided by directions service | Estimated typical duration provided by directions service | |
| TRANSIT | Detailed route distance provided by directions service | Estimated typical duration provided by directions service | |
| BICYCLING | Detailed route distance provided by directions service | Estimated typical duration provided by directions service | |
| WALKING | Detailed route distance provided by directions service | Estimated typical duration provided by directions service | |
| CUSTOM PATH | Sum of geodesic distance between each point | None |
We then add up all of the segment distances to calculate the total trip distance. Also, you’ll notice that we display distances in both Miles and Kilometers. We know that many of you are on the metric system, but we felt that it’s better to always have both.
Can you add/edit duration manually?
Durations cannot be added or edited manually at the moment.
What about past trips?
If you have a trip that was created before April 19, 2025, the distance was calculated using the old method, and is likely inaccurate if you have driving/walking/custom paths. If you’d like to update it to have more accurate distances, here’s what you can do:
- Go to the trip page
- Click [ Edit Map ] to open the editor
- Click each line and select the appropriate travel mode (even if it’s already selected). This will recalculate the distance for that segment.
- After you’re done, click [ Save & Exit ]
- You’ll now see distances for each segment and a more accurate total distance
We know this is a manual process that could take some time, so we apologize for that. We didn’t feel comfortable running a script to automatically edit people’s maps in the background. We don’t like doing that sort of thing because we want everything you create on Tripline to be under your control as much as possible, and as much as automated processes can help speed things up, there’s always the risk that something goes wrong.
If you have any further questions, please contact support@tripline.net